

A time capsule is a sealed container filled with objects, documents, and messages meant to preserve a snapshot of the present for people in the future. It serves as a bridge across generations, offering insight into daily life, culture, technology, and personal stories that might otherwise fade from memory. Creating one can be a deeply personal project for families, schools, communities, or individuals. Whether you intend to bury it for decades or store it for centuries, the process combines creativity, careful planning, and practical preservation techniques. This guide walks through every step in detail, from initial planning to final sealing, so that your capsule endures and delights its eventual discoverers.
Why Create a Time Capsule
People have made time capsules for thousands of years. Ancient examples include foundation deposits in Egyptian temples or Babylonian clay tablets sealed with messages. In the modern era, the 1938 Westinghouse Time Capsule at the New York World’s Fair captured artifacts from the 1930s and included a message from Albert Einstein. The appeal remains timeless: it satisfies curiosity about what life was like in another era. For families, it records milestones like births, weddings, or moves. Schools use capsules to document student life and trends. Communities mark historical events such as anniversaries or disasters. On a personal level, it becomes a therapeutic way to reflect on current values and hopes. The future audience might include your own descendants, historians, or even extraterrestrial explorers if the capsule survives long enough. Whatever the motivation, the act forces you to curate what matters most right now.
Step One: Define Your Purpose and Timeline
Begin by clarifying the capsule’s goal. Ask yourself who will open it and when. A short-term capsule for ten years suits a family milestone, such as a child’s high school graduation. A medium-term project lasting fifty years works well for a school or neighborhood. Long-term capsules spanning one hundred years or more require extra durability and often involve public institutions. Write down your answers in a planning notebook. Decide on a theme, such as daily life in your city, environmental changes, technology evolution, or personal family history. Themes keep selections focused and prevent the capsule from becoming a random junk drawer. Set a realistic opening date and note it prominently on all records. If you plan to involve others, hold a planning meeting to gather input. This early step ensures every later decision aligns with the overall vision.
Step Two: Choose the Right Container
The container forms the first line of defense against time, moisture, and temperature changes. Select based on the burial duration and location. For short-term projects, a sturdy plastic bin with a tight lid works well because it is lightweight and inexpensive. For medium-term use, consider a stainless-steel or aluminum box sold specifically as time-capsule kits; these resist rust and come with gaskets. Long-term capsules demand more robust options. Stainless-steel drums or copper pipes sealed at both ends offer excellent protection because those metals do not corrode easily in soil. Avoid glass or ceramic alone because they shatter under pressure. PVC pipe sections can serve as affordable tubes if you seal the ends with threaded caps and silicone. Size matters too. A capsule holding ten to twenty items might fit in a shoebox-sized container, while a community project could require a fifty-gallon drum. Measure your chosen items first to avoid wasted space. Whichever material you pick, test its seal by submerging it briefly in water before assembly. Mark the exterior with engraved or painted instructions such as “Do Not Open Until 2050” to deter accidental discovery.
Step Three: Gather and Select Contents
Choose items that represent your era without taking up excessive space. Start with paper documents because they convey the most information. Print letters, newspaper clippings, event programs, and personal diaries on acid-free archival paper. Include photographs printed on matte archival stock rather than glossy paper that fades faster. Add small artifacts like coins, postage stamps, product packaging, or fabric swatches from current fashion. Children’s drawings, school reports, or handwritten recipes capture everyday creativity. For technology, include a USB drive with digital files, but always pair it with printed versions because electronics become obsolete quickly. Music lovers can burn a CD of popular songs or include lyrics sheets. Avoid perishable items such as food, batteries, or anything containing liquids that could leak or mold. Do not include anything explosive, toxic, or valuable enough to tempt looters. Limit the total to fifteen or twenty objects so the capsule remains manageable. Prioritize uniqueness; a grocery receipt from today tells more about inflation and consumer habits than a generic magazine cover.
Step Four: Prepare Items for Longevity
Preservation techniques determine whether contents survive. For paper, place each sheet inside individual acid-free folders or sleeves. Seal groups of papers inside vacuum bags or mylar envelopes to block air and humidity. Photographs benefit from the same sleeves. Small objects such as coins or keys should be wrapped in acid-free tissue paper and then placed in small plastic bags. Electronics like USB drives require extra care; enclose them in static-free bags and add desiccant packets to absorb moisture. If you include seeds or dried plant material, use separate airtight containers. Write a detailed inventory list on archival paper and include it inside; this helps future readers understand context. For very long-term projects, consider microfilming important documents because film lasts longer than regular paper. Test every preparation method on sample items first. The goal is to create multiple layers of protection so that even if the outer container develops a small leak, the contents remain safe.
Step Five: Assemble and Pack the Capsule
Pack systematically to protect fragile items. Place the heaviest objects at the bottom to avoid crushing lighter ones. Layer with bubble wrap or crumpled acid-free paper for cushioning. Fill empty spaces with additional packing material so items do not shift during burial or transport. Insert the inventory list near the top for easy access. Add a personal letter addressed “To the Finder” that explains the capsule’s purpose, your name, the creation date, and the intended opening year. Include contact information or a website if you want future discoverers to reach out. Seal inner packages individually before placing them inside the main container. This modular approach makes it easier to remove items later without disturbing everything. Weigh the packed capsule to confirm it matches your expectations for burial depth.
Step Six: Seal the Container Securely
A proper seal prevents water, insects, and oxygen from entering. For plastic bins, apply a continuous bead of waterproof silicone caulk around the lid edge before closing. For metal containers, use marine-grade epoxy or weld the seams if you have the equipment. Copper pipes require soldering or epoxy caps. Test the seal by filling the assembled capsule with air and submerging it in a tub of water; bubbles indicate leaks that need repair. For extra protection in burial projects, wrap the entire container in heavy plastic sheeting or place it inside a second larger vessel. Label the exterior again with durable paint or etched lettering. Record the exact sealing date and methods in your personal records.
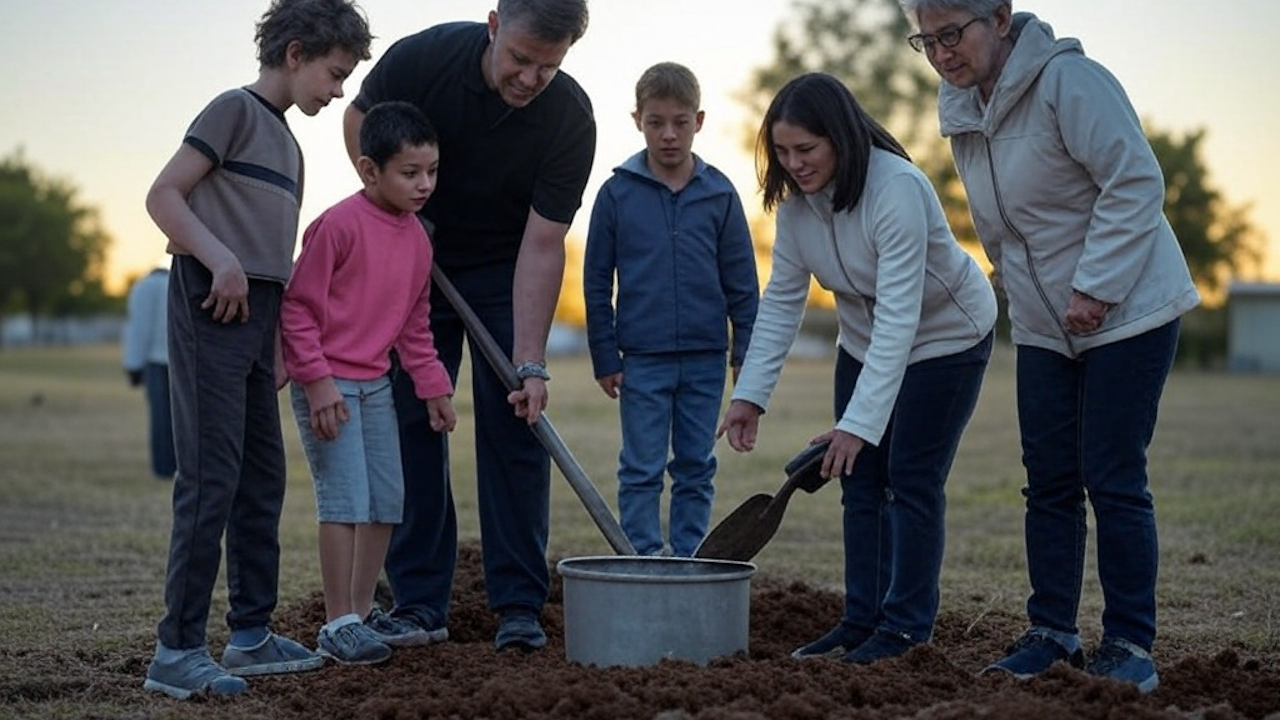
Step Seven: Choose a Safe Location and Bury or Store
Location determines survival odds. Indoor storage in a climate-controlled attic or museum vault suits short-term capsules because it avoids soil pressure and flooding. For burial, select high ground away from flood zones, construction sites, or tree roots that could crack the container. Mark the spot on a detailed map with GPS coordinates. Dig a hole at least three feet deep to protect against frost heave and animals. Line the hole with gravel for drainage, lower the capsule gently, and cover it with more gravel before backfilling soil. Install a non-metallic marker such as a concrete slab or plastic stake above ground to help locate it later without metal detectors that might confuse searchers. If you choose public land, obtain necessary permits and notify local historical societies. Private property offers more control but requires clear instructions in wills or deeds so heirs know the capsule exists.
Step Eight: Document Everything for Future Discovery
Create a permanent record outside the capsule itself. Write a detailed description including its contents summary, burial depth, coordinates, and opening instructions. Store copies in multiple places: your safe deposit box, family archives, local library, and online cloud storage. Register the capsule with organizations such as the International Time Capsule Society, which maintains a global database. Send letters to newspapers or post online announcements so future generations can search for it. Include a small secondary note inside the capsule directing readers to these external records. This documentation multiplies the chances that someone will find and appreciate your work centuries from now.
Modern Variations and Digital Additions
Traditional capsules remain popular, yet technology allows creative updates. Create a hybrid capsule by adding a QR code etched on the container that links to a password-protected website with videos, photos, and audio recordings. Use blockchain to timestamp digital files so their authenticity can be verified later. Some people embed small solar-powered devices that broadcast a signal after a set number of years, though this technology is still experimental. For purely digital time capsules, upload curated files to dedicated online platforms designed for long-term storage. However, always include physical backups because internet services can disappear. These hybrids blend old and new methods, making the capsule more accessible while preserving tangible artifacts.
Common Mistakes to Avoid
Many first-time creators rush the process and regret shortcuts. Never use ordinary cardboard or paper because they degrade within years. Skip household containers like cookie tins that rust quickly. Avoid overpacking; cramped items break during movement. Do not bury near water sources or in acidic soil without extra barriers. Failing to test the seal leads to ruined contents. Neglecting external documentation means the capsule may stay lost forever. Budget time and money for quality materials; cheap supplies often fail. Involve children or community members thoughtfully so everyone understands the project’s importance.
Famous Examples for Inspiration
The Crypt of Civilization at Oglethorpe University in Georgia, sealed in 1940, holds records intended to last until 8113. The 1938 Westinghouse capsule, recovered in 2019 after eighty years, revealed how much daily life had changed. Smaller personal capsules appear in backyards worldwide, often uncovered during home renovations and shared on social media. Studying these successes shows that careful material choices and clear instructions make the difference between preservation and disappointment.
Conclusion: Your Legacy Across Time
Creating a time capsule requires patience and attention to detail, yet the reward is profound. You capture a moment that would otherwise slip away and gift it to unknown future hands. Whether your capsule travels decades or centuries, it carries your voice forward. Gather your items today, follow these steps methodically, and seal your story with confidence. Future generations will thank you for the window into a world they can only imagine. Start small if you feel overwhelmed; even a simple shoebox version teaches valuable lessons and sparks joy. The past is written, the present is fleeting, and the future waits for what you choose to save.