

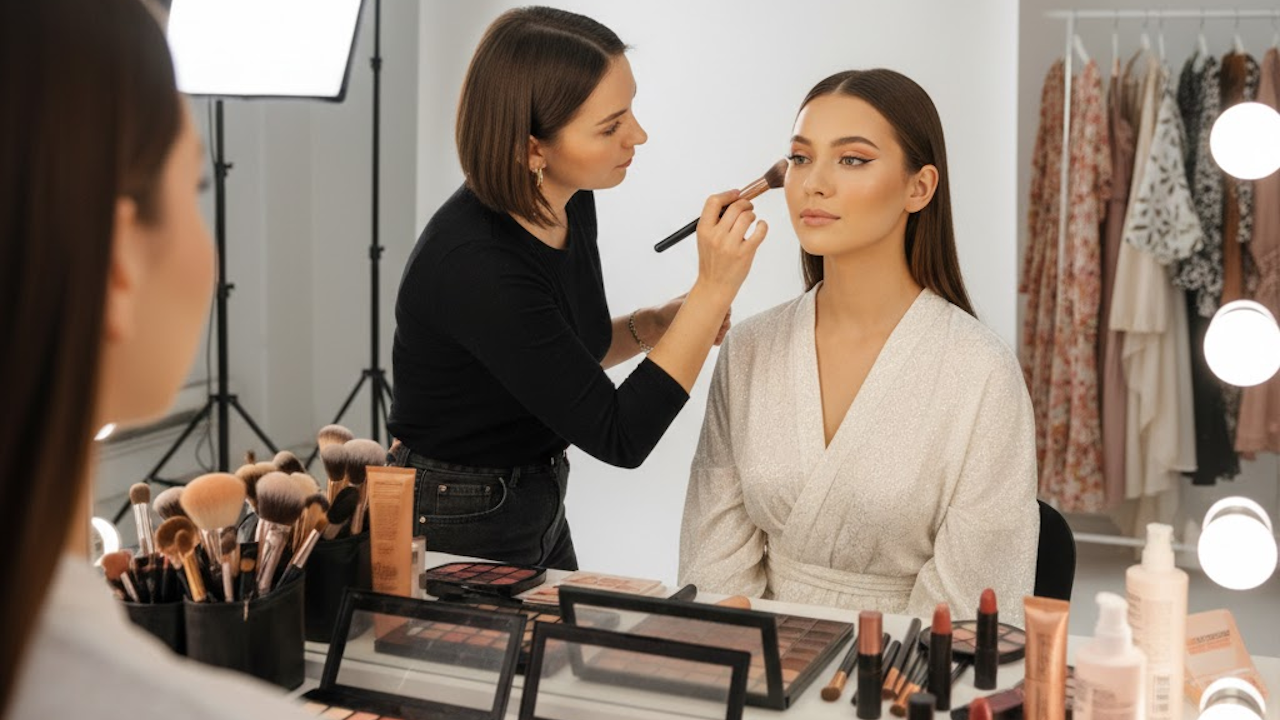
Photoshoot makeup transforms ordinary features into camera-ready perfection. High-resolution cameras capture every detail, while lighting setups can flatten faces, wash out colors, or create unwanted shine. Everyday makeup often fails under these conditions because it lacks the intensity, longevity, and strategic placement needed to counteract how lenses and flashes interact with skin. The goal is to enhance natural beauty, define facial structure, and ensure the look holds up for hours without constant touch-ups. Whether you are preparing for a fashion editorial, beauty campaign, headshot session, or personal portfolio shoot, mastering these techniques delivers polished results that translate beautifully on screen and in print.
Successful photoshoot makeup begins long before the first brush touches skin. It requires thoughtful product selection, skin preparation, and an understanding of how different elements perform under specific conditions. This guide walks through every stage in detail so you can achieve professional-level results whether you work with a makeup artist or handle the application yourself.
Understanding the Differences Between Everyday and Photoshoot Makeup
Everyday makeup prioritizes comfort, speed, and a natural finish suitable for real-life interactions. Photoshoot makeup, by contrast, must survive intense scrutiny from multiple angles and lighting variations. Cameras tend to emphasize texture, pores, and unevenness while simultaneously flattening dimension. This means you need stronger contouring, more precise highlighting, and fuller coverage in key areas without creating a mask-like appearance.
Color payoff matters more because pigments can appear muted on camera. Lips and cheeks require bolder application than usual. Eyes need sharper definition so they do not disappear under bright lights. Longevity becomes non-negotiable during long shoots that may last four to twelve hours. Products must resist creasing, fading, and transfer while withstanding heat from studio lights or outdoor conditions. The final look should photograph as flawless yet still feel like an elevated version of the person wearing it.
Pre-Shoot Skincare Routine
Healthy skin forms the foundation of any great makeup application. Begin preparations at least one week before the shoot. Exfoliate gently two to three times during that week to remove dead skin cells that can cause makeup to look patchy. Use a hydrating sheet mask or overnight treatment the night before to plump the skin and improve texture.
On the morning of the shoot, start with a thorough cleanse using a gentle, non-stripping cleanser. Follow with a hydrating toner to restore the skin barrier. Apply a lightweight, non-comedogenic moisturizer suited to your skin type and allow it to absorb fully. Pat on an eye cream to reduce puffiness and fine lines. Finish with lip balm to smooth and hydrate the lips so lipstick applies evenly later.
If your skin tends to be oily, incorporate a mattifying primer or lightweight serum with niacinamide in your routine. Dry skin benefits from richer creams and facial oils used sparingly under moisturizer. Combination skin requires targeted treatment: heavier hydration on dry zones and oil control on the T-zone. Consistent hydration prevents makeup from clinging to dry patches or sliding on oily areas.
Gathering Your Tools and Products
Assemble everything the day before so nothing is forgotten on shoot day. You will need a full-coverage foundation matched perfectly to your skin tone and undertone. Choose formulas labeled long-wear or transfer-resistant. Have a creamy concealer for under-eye brightening and spot coverage plus a color corrector if you deal with dark circles or redness.
Setting powder in both loose and pressed forms helps control shine and lock everything in place. Include cream and powder contour products, bronzer, and blush. Highlighter should be subtle and finely milled to avoid emphasizing texture. For eyes, gather a neutral eyeshadow palette with both matte and satin finishes, eyeliner in pencil and liquid forms, brow powder or pencil, and high-quality mascara or false lashes.
Lip products should include a lip liner, long-wear lipstick or stain, and optionally a clear gloss for the final touch. Essential tools include a damp beauty sponge, various brushes for foundation, powder, contour, and eyes, an angled brush for brows, and cotton swabs for cleanup. Do not forget setting spray, blotting papers, and oil-absorbing sheets for touch-ups during the shoot. A small mirror with magnification and good lighting helps with precision.
Step 1: Priming the Skin
Primer creates a smooth canvas and helps makeup adhere. Choose a silicone-based primer for most skin types because it fills pores and fine lines while giving foundation something to grip. Apply a pea-sized amount to the entire face after skincare has absorbed. Pat rather than rub to avoid disturbing the skin barrier.
For oily or combination skin, use a mattifying or pore-blurring primer focused on the T-zone. Dry or mature skin benefits from a hydrating primer with glycerin or hyaluronic acid. Apply eye primer to the lids to prevent eyeshadow creasing and to make colors appear more vibrant. Lip primer or a thin layer of balm keeps lipstick from feathering.
Allow the primer to set for one to two minutes before moving to foundation. This short wait ensures the product has formed a proper barrier and prevents pilling when foundation is applied.
Step 2: Applying Foundation
Foundation provides even skin tone and coverage for blemishes or redness. Select a shade that matches your jawline and neck in natural daylight. Test the color on your face rather than your hand or wrist because those areas often differ in tone.
Apply foundation in thin layers using a damp beauty sponge for the most seamless, airbrushed finish. Start in the center of the face and blend outward toward the hairline and jaw. Build coverage only where needed rather than applying a heavy layer everywhere. This technique keeps the makeup looking natural while still photographing cleanly.
For dry skin, mix a drop of facial oil into the foundation or use a hydrating liquid formula. Oily skin performs better with matte or semi-matte foundations that control shine throughout the day. Combination skin often benefits from applying a mattifying foundation on the T-zone and a slightly more luminous one on the cheeks. Always blend down the neck to avoid visible lines.
Step 3: Concealing and Color Correcting
Concealer brightens the under-eye area and covers remaining imperfections. Use a shade one to two tones lighter than your foundation for under eyes to create a lifted effect. Apply in a triangle shape under each eye, extending toward the temples. Pat gently with the sponge to blend without tugging delicate skin.
For blemishes or redness, choose a concealer that matches your foundation exactly. Apply with a small brush or the pointed end of the sponge and set immediately with powder to prevent creasing. Color correction tackles discoloration before concealer. Peach or orange correctors neutralize blue or purple dark circles common in deeper skin tones. Green correctors calm redness, while lavender tones brighten sallow or dull complexions. Apply corrector sparingly and blend thoroughly before layering concealer on top.
Step 4: Setting the Base
Setting powder locks the foundation and concealer in place while controlling shine that cameras love to highlight. Use a finely milled translucent powder or one matched to your skin tone. Apply generously under the eyes using a puff or large powder brush in a pressing motion. This baking technique helps the concealer last longer and prevents creasing.
Dust powder lightly across the rest of the face, focusing on the T-zone, chin, and around the nose. Avoid over-powdering the cheeks if you plan to apply cream blush later. For extra longevity during long shoots, consider the “bake and set” method: let the powder sit for five to ten minutes before brushing away the excess. This allows body heat to set the makeup underneath.
Step 5: Sculpting with Contour and Bronzer
Contouring restores dimension that lighting can remove. Use a cool-toned contour product two to three shades deeper than your skin tone. Apply cream contour first for a natural blend, then set with powder contour for staying power. Draw lines along the hollows of the cheeks, temples, jawline, and sides of the nose. Blend thoroughly so no harsh lines remain.
Bronzer adds warmth and a sun-kissed effect. Choose a shade that complements rather than overpowers your natural tone. Apply to the perimeter of the face, along the hairline, and across the bridge of the nose where the sun would naturally hit. Blend well into the contour so the two products transition seamlessly.
For photoshoots, keep contour and bronzer slightly stronger than everyday application because cameras can flatten these features. Always check your work in photos taken with the same lighting conditions you will encounter on set.
Step 6: Adding Color with Blush and Highlighter
Blush brings life back to the face after foundation has evened everything out. Cream blush applied over foundation and set with powder offers a fresh, skin-like flush. Powder blush works well for longer wear. Smile to find the apples of the cheeks and apply color there, sweeping slightly upward toward the temples.
Highlighter draws attention to the high points of the face. Apply to the tops of the cheekbones, brow bone, inner corners of the eyes, and bridge of the nose. Choose a finely milled formula without large glitter particles that can read as texture on camera. For a more subtle effect suitable for beauty shoots, use a satin or luminous finish rather than intense shimmer.
Apply highlighter sparingly at first and build as needed. Overdone highlight can look greasy or emphasize pores under bright lights. Test the intensity by taking a flash photo of your face during practice sessions.
Step 7: Perfecting the Brows
Brows frame the face and provide structure in photographs. Begin by grooming them with a spoolie brush. Fill sparse areas with a brow powder or pencil that matches your natural hair color. Use short, hair-like strokes rather than a solid block of color for the most natural result.
Define the shape by extending the tail slightly if needed and creating a soft arch. Set the brows with a clear or tinted brow gel to keep hairs in place throughout the shoot. Well-groomed brows make the entire face appear more polished and help balance bold eye or lip looks.
Step 8: Eye Makeup Techniques
Eye makeup requires extra attention because eyes are often the focal point of photos. Start with eyeshadow primer to ensure colors stay vibrant and do not crease. Apply a transition shade in the crease using a fluffy brush to add depth without harsh lines.
Build dimension with medium and dark shades on the outer corner and along the lash line. Use lighter shades on the inner corner and center of the lid to brighten and open the eyes. Shimmer shadows work best on the center of the lid or inner corner rather than the entire lid, where they can emphasize texture.
Tightline the upper waterline with a waterproof pencil to make lashes appear fuller. Apply liquid or gel eyeliner along the upper lash line for definition. A subtle wing can elongate the eye shape beautifully in photos. Finish with several coats of lengthening and volumizing mascara. For extra drama, apply false lashes or individual clusters. Choose a style that complements your eye shape and the overall aesthetic of the shoot.
Step 9: Finishing with Lips
Lips need clear definition and lasting color. Exfoliate gently if needed, then line the lips with a pencil that matches your chosen lipstick. Slightly overline the cupid’s bow and outer corners if you want a fuller appearance, but keep the line natural.
Fill the lips with the liner or apply lipstick directly. For long wear, use a lip stain or liquid lipstick formula that dries down. Blot once with tissue and apply a second layer for richer color. A touch of gloss in the center of the lips adds dimension without overwhelming shine that can look greasy on camera.
Choose lip colors that complement your skin tone and the overall makeup look. Nudes and soft pinks photograph beautifully for natural beauty shoots, while bolder reds and berries work well for fashion editorials. Always have blotting papers ready because lips can transfer onto teeth or clothing during long sessions.
Special Considerations for Lighting and Camera
Lighting dramatically affects how makeup appears in final images. Natural daylight reveals every detail and requires the most skin-like application. Studio lighting with softboxes flatters skin but can wash out color, so you may need slightly stronger blush and lip application. Direct flash photography demands careful powdering and avoidance of products containing SPF, which can create white cast or flashback.
Test your completed makeup under the exact lighting conditions of the shoot whenever possible. Take test photos with your phone or camera using flash and without. Adjust intensity accordingly. Colors that look perfect in the mirror may appear too dark or too light once photographed, so minor tweaks on set are common.
Dealing with Flash Photography and Avoiding Flashback
Flashback occurs when certain ingredients, especially zinc oxide and titanium dioxide found in many sunscreens, reflect flash and create white patches in photos. Choose foundation, powder, and concealer formulas without SPF for shoots involving flash. If your regular products contain SPF, test them thoroughly in advance with flash photography.
Apply setting powder generously but blend well so it does not sit heavily on the skin. Carry blotting papers and a small powder brush for quick touch-ups between shots. Avoid heavy layers of highlighter on the nose and cheeks when flash will be used, as these areas catch light easily.
Makeup for Different Skin Types and Tones
Oily skin requires extra mattifying steps. Use oil-control primers, mattifying foundations, and plenty of setting powder. Touch up shine with blotting papers rather than adding more powder, which can look cakey after several hours.
Dry skin needs hydration at every stage. Mix facial oil into foundation or use cream products that melt into the skin. Avoid heavy powders and focus on cream blush and highlighter for a dewy yet controlled finish.
Deeper skin tones benefit from richly pigmented products that do not appear ashy. Choose foundations with warm or neutral undertones and contour shades that provide true depth rather than gray tones. Highlight with champagne or gold-based formulas that complement richer complexions.
Fair skin can look washed out under bright lights, so slightly stronger contour and blush help restore dimension. Cool-toned products often photograph beautifully on fair skin with pink undertones.
Longevity Tips for Long Shoots
Long shoots require products and techniques designed for endurance. Use long-wear foundations, waterproof eyeliners, and smudge-proof mascaras. Setting spray applied in thin layers throughout the process helps lock everything together. Carry a small kit with blotting papers, powder, lipstick, and cotton swabs for quick fixes.
Avoid touching your face during the shoot. If you feel shine developing, blot rather than wipe. Reapply setting spray lightly between outfit changes if needed. Communicate with the photographer and any assistants so they understand which areas of your makeup are most delicate.
Common Mistakes and How to Avoid Them
One frequent error is applying too much product in an attempt to achieve full coverage. Build gradually and blend thoroughly to prevent a heavy, mask-like appearance that looks obvious in high-resolution images.
Another mistake involves skipping primer or setting powder, which leads to makeup breaking down or creasing within the first hour. Always take the time for these foundational steps.
Choosing the wrong foundation shade or undertone creates visible lines at the jaw and neck. Test in natural light and on the actual day of the shoot because skin tone can shift slightly with weather or stress.
Over-highlighting or using glittery products can emphasize texture and pores under studio lights. Opt for subtle luminosity instead.
Finally, neglecting to test the full look in photographs before the shoot often results in surprises on set. Always do a complete makeup run-through with test photos at least one day prior.
When to Hire a Professional Makeup Artist
Professional makeup artists bring expertise, high-quality products, and the ability to work quickly under pressure. They understand how different lighting and camera setups affect makeup and can make real-time adjustments. For important commercial shoots, magazine features, or when you feel uncertain about achieving the desired look, hiring a professional is a worthwhile investment.
Even if you prefer doing your own makeup, consulting with an artist for a trial run can provide valuable education on techniques and product recommendations tailored to your features and the specific shoot requirements.
Post-Shoot Makeup Removal and Skin Care
Proper removal protects your skin after a long day of heavy makeup. Use an oil-based cleanser or makeup remover wipes to break down long-wear formulas. Follow with your regular cleanser to remove any residue. Apply a soothing mask or hydrating serum to replenish moisture lost during the shoot.
Avoid harsh scrubbing, which can irritate skin that has already been through a full day of products and lighting. Give your skin a day or two of gentle care before returning to a full makeup routine.
Conclusion
Creating makeup that looks exceptional in photographs requires attention to detail, quality products, and techniques that account for how cameras and lighting interact with skin. By focusing on thorough skin preparation, strategic application, and proper setting, you can achieve looks that enhance your features while withstanding the demands of a photoshoot. Practice these steps in advance, test everything under relevant lighting conditions, and adjust based on your unique skin type and the specific requirements of each project. With patience and consistency, photoshoot makeup becomes a reliable skill that helps you look and feel confident in front of any camera.