

Planning a wedding can be an exciting yet expensive endeavor. One of the biggest costs often comes from decorations that transform a venue into a romantic and memorable space. Fortunately, with a bit of creativity and time, couples can create stunning DIY wedding decorations that look professional without draining their savings. DIY projects not only cut costs but also add a personal touch that reflects the couple’s unique style and story. This comprehensive guide explores practical ideas, materials, step-by-step instructions, and tips to help you craft beautiful decorations on a budget.
The Benefits of Choosing DIY for Your Wedding Decor
Opting for do-it-yourself decorations offers several advantages. First, it significantly reduces expenses. Professional decorators can charge hundreds or thousands of dollars for setups that you can replicate for a fraction of the price using affordable supplies from local stores or online marketplaces. Second, DIY allows for customization. You can incorporate colors, themes, and elements that hold special meaning to you and your partner, such as family heirlooms or hobbies. Third, it creates opportunities for involvement from friends and family. Turning decoration prep into a group activity can strengthen bonds and generate lasting memories before the big day.
Budget considerations are key. Aim to allocate no more than 10 to 15 percent of your total wedding budget to decor. With smart sourcing, many projects can be completed for under 50 dollars each. Focus on reusable or multipurpose items that can serve dual roles, like centerpieces that double as favors. Additionally, consider the venue’s existing features. Many halls or outdoor spaces already have architectural elements that can be enhanced rather than completely covered.
Essential Materials and Sourcing Strategies
Before diving into projects, gather basic supplies that form the foundation for most DIY decorations. Common low-cost items include mason jars, fairy lights, burlap fabric, kraft paper, twine, fresh or faux flowers from discount stores, cardboard, spray paint, and ribbons. Thrift stores, dollar stores, and garage sales are treasure troves for glassware, frames, and vases. Online platforms like social media marketplace groups often have free or cheap wedding leftovers from previous couples.
For flowers, buy in bulk from wholesale markets or grow your own if time permits. Seasonal blooms are cheaper and more sustainable. Fabric remnants from craft stores can create table runners or backdrops. Repurpose household items such as wine bottles or old books. Always plan ahead and make a detailed shopping list to avoid impulse buys. Buy generic brands and focus on neutral bases that can be dressed up with paint or accents.
Centerpieces That Impress Without High Costs
Centerpieces are focal points on reception tables. A popular budget option is the mason jar arrangement. Collect various sizes of jars, clean them thoroughly, and fill them with water and fresh flowers. For a rustic look, wrap the jars with twine or lace. Add floating candles for evening ambiance. This project costs about five to ten dollars per table and can be assembled in minutes.
Another idea is the wooden crate centerpiece. Source small crates from farm supply stores or repurpose shipping boxes. Paint them in your wedding colors, then fill with potted plants, books, or candles. Stack crates at varying heights for visual interest. Include personal touches like framed photos of the couple at different life stages.
For a modern minimalist vibe, use clear glass cylinders filled with layers of sand, pebbles, and a single tall candle. These are durable and can be disassembled after the event for future use. If you prefer edible decor, create fruit and herb displays in bowls. Lemons, limes, and rosemary sprigs offer fresh scents and colors at minimal expense.
Floral Arrangements and Bouquets on a Budget
Flowers can consume a large portion of the decor budget, but DIY alternatives keep things affordable. Start with faux flowers for practice arrangements, then invest in a few real stems for key areas. A simple garland can be made by stringing flowers and greenery on fishing line or wire. Drape these along railings, tables, or arches.
For boutonnieres and corsages, use small clusters of baby’s breath, succulents, or dried lavender tied with ribbon. These hold up well and can be made weeks in advance. Bulk buy eucalyptus and ferns, which are inexpensive fillers that add volume. Create a hanging floral installation by attaching bunches to a hoop or branch with hot glue or wire. Suspend it over the dance floor or sweetheart table for dramatic effect without needing a florist.
Signage and Welcome Elements
Directional signs and welcome boards guide guests and set the tone. Use large wooden planks or foam boards from craft stores. Paint or stencil messages like “Welcome to Our Forever” or seating charts. For a vintage feel, write on old mirrors with chalk markers. These can be found cheaply at flea markets.
Create a photo guest book backdrop with a frame made from PVC pipes wrapped in lights and fabric. Guests can pose and leave notes on attached cards. Printable signs downloaded for free from design sites and printed at home on cardstock offer another low-cost route. Frame them in mismatched thrift store frames painted uniformly for cohesion.
Lighting Ideas to Create Atmosphere
Lighting transforms any space. String lights are a staple and can be purchased in bulk for under 20 dollars. Hang them in patterns across ceilings or wrap them around tree branches for outdoor weddings. Battery-operated fairy lights inside paper lanterns add softness without electricity needs.
Candles provide warmth and romance. Use hurricane glasses to protect flames and extend burn time. Group pillar candles of different heights on mirrored trays for reflection and elegance. LED versions eliminate fire hazards and are reusable. For a DIY chandelier effect, suspend mason jars with tea lights from a branch or hoop using chains or rope.
Table Settings and Linens
Elevate tables with handmade runners from burlap or muslin fabric cut to size and frayed at edges. Fold napkins into simple shapes and secure with personalized tags. Place cards can be made from kraft paper tags tied to mini bottles or attached to favors like small succulents in pots.
Menu boards on easels made from cardboard and chalk paint save printing costs. For place settings, use layered chargers cut from cardboard circles painted gold or silver. Add a single flower or herb sprig to each plate for a pop of color. These details make tables feel complete without expensive rentals.
Ceremony Arch and Aisle Decor
The ceremony area deserves special attention. Build an arch using PVC pipes or wooden dowels as a frame, then wrap with greenery, fabric, and flowers. Secure with zip ties and floral tape. This structure can cost less than 30 dollars and serves as a beautiful photo prop.
Line the aisle with lanterns, petals, or small potted plants. Scatter rose petals from a bulk bag or use confetti made from hole-punched paper. For seating, tie ribbons or bows to chairs using leftover fabric. If chairs are uniform, simple sashes suffice.
Personalized Favors and Extras
Favors double as decor when displayed creatively. Fill small jars with homemade treats like cookies or candy. Label them with thank you notes. Create seed packets for guests to plant in memory of your day. Display them on a tiered stand made from painted boxes.
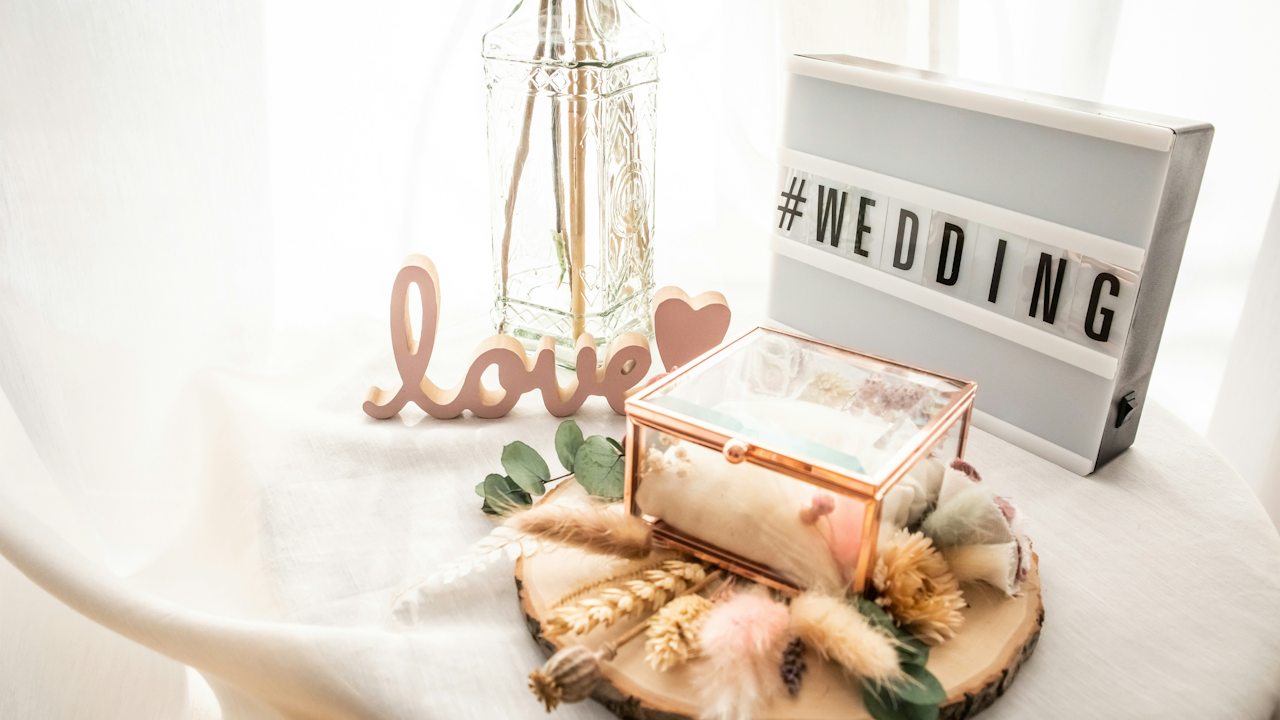
Photo booths can be assembled with a backdrop of streamers, balloons, and props from dollar stores. Include a sign with hashtag prompts for social media sharing. Balloon arches or garlands add height and festivity at low cost. Use helium tanks sparingly or opt for air-filled options hung strategically.
Step-by-Step Projects for Beginners
Project One: Rustic Centerpiece
Materials: Mason jars, twine, flowers, candles, spray paint.
- Clean and dry jars.
- Spray paint lids or bases if desired, allowing time to dry.
- Wrap twine around jar necks and tie bows.
- Fill with water and arrange flowers asymmetrically.
- Place a candle beside or inside larger jars.
- Test stability on tables before the event.
Project Two: Fabric Backdrop
Materials: Assorted fabrics, curtain rod or frame, safety pins or glue.
- Cut fabric into strips or panels of varying lengths.
- Drape and layer pieces over the rod, securing with pins.
- Add lights behind for glow.
- Adjust for wrinkles by steaming lightly.
- This works well behind the head table or altar.
Project Three: Paper Flower Wall
Materials: Tissue paper, cardstock, wire, hot glue.
- Cut tissue into petal shapes.
- Layer and scrunch petals around a center.
- Attach to a wire frame or directly to a wall with tape.
- Vary sizes and colors for dimension.
- Ideal for photo areas or dessert tables.
Tips for Success and Time Management
Start early, ideally six to nine months before the wedding. Create a schedule for each project and batch similar tasks. Enlist help from bridal party members during crafting sessions with snacks and music to keep energy high. Test all setups at the venue if possible to account for lighting and space.
Consider weather if outdoors. Secure items against wind with weights or stakes. For indoor venues, check fire codes regarding candles and fabrics. Take photos of your creations for reference and vendor coordination.
Personalization makes DIY special. Incorporate cultural elements, shared interests, or meaningful symbols. For example, if you both love books, use stacked volumes as risers. Track expenses meticulously to stay within budget.
Common Pitfalls to Avoid
Overcommitting to too many projects can lead to burnout. Prioritize high-impact areas like the ceremony and reception tables. Poor quality materials may not hold up, so test durability. Avoid trends that do not match your theme, as timeless designs photograph better.
Last-minute changes can disrupt plans. Have backup supplies ready. Delegate tasks but provide clear instructions. Remember that perfection is not the goal. Slight imperfections add charm and authenticity.
Conclusion
Budget-friendly DIY wedding decorations prove that creativity and resourcefulness can produce breathtaking results. By focusing on personal touches, smart sourcing, and straightforward projects, you can design a celebration that feels luxurious without the luxury price tag. These handmade elements will not only save money but also infuse your wedding with love and individuality that guests will remember fondly. Take it one step at a time, enjoy the process, and celebrate the beautiful day you have crafted together. Your efforts will create a unique atmosphere that truly represents your journey as a couple.